

Google Apps Script is endlessly useful; in this post you will learn how to write a mail merge with Google Apps Script. It’s less than 30 lines of code! You can use this technique to send personalized emails individually to many recipients. In the second part of this post, you will learn how to schedule these emails to send in the future.
Part 1: Writing a Mail Merge
A mail merge is a program that sends an email to many recipients, automatically filling in the contents of the email according to a template. It’s like a form letter. Each recipient receives a personalized copy of the email.
In this section we use Google Apps Script to create a mail merge that sends personalized “Happy Birthday” messages to a group of our friends. This will involve writing a template email, creating a spreadsheet, and writing a small amount of JavaScript code. With practice, you can perform tasks like this in well under an hour.
First, we draft the email in Gmail. We’ll use angle brackets for the parts of the message we want to replace with data from our spreadsheet.
Subject:
  Happiest Birthday!

Body:
  Dear <name>,

  Happy birthday! I think you, <name>, personally are awesome.
  You may be getting older, but you're still the coolest person I know.
  What are you now, <age>? Wow.

  Party on!
  David
Next, we create a Google Spreadsheet ( sheets.google.com) with three columns like this:
Name  Email  Age
...   ...    ...
(To add yourself to my spreadsheet and actually receive a happy birthday email on your alleged birthday, just fill out this form.)
Inside your spreadsheet, choose Tools > Script Editor. This creates a new Apps Script associated with your spreadsheet.
Now it’s time to write some JavaScript. We’re going to write a function to perform the mail merge.
We’ll call it performMailMerge and it won’t have any parameters, e.g.:
function performMailMerge() {}
It will use the built in SpreadsheetApp library to access the spreadsheet, the SpreadsheetDB library to perform basic data lookup operations on the spreadsheet, and the built in GmailApp library to look up drafts and send emails.
SpreadsheetDB is a small library (a collection of useful functions) that allows us to quickly process rows in a spreadsheet, referencing columns by their header names. Choose one of the two options below for using SpreadsheetDB.
-
To use the library SpreadsheetDB, choose Resources > Libraries > Add a library and enter
193p7IxBukPVkoxwMH8UDcdkYJiNCDWSylMA_htgliEPxjjqixhzKt_2g. This is the ID of the SpreadsheetDB library. Select the latest version from the version dropdown menu. It should say “SpreadsheetDB” if you’ve done it right. This will allow you to use functions from the SpreadsheetDB library in your project. -
To use SpreadsheetDB from source, create a new file in your project and name it
spreadsheet.gs(the name is not important). Copy and paste in the source of SpreadsheetDB from the Gist here. If you choose to copy and paste the source into your project, then you must omit the prefix “SpreadsheetDB.” from your calls to the SpreadsheetDB functions in the following code. E.g.SpreadsheetDB.getColumnIndexesFromSheetwould become justgetColumnIndexesFromSheet.
Now that you’re set up with SpreadsheetDB, I’ll start by showing you the full program, then I’ll explain what each line does.
function performMailMerge() {
  var spreadsheet = SpreadsheetApp.getActiveSpreadsheet();
  var sheet = spreadsheet.getSheetByName("Sheet 1");
  var indexes = SpreadsheetDB.getColumnIndexesFromSheet(sheet);
  var subject = "Happiest Birthday!";
  var draftMessage = getDraftMessageBySubject(subject);
  var templateBody = draftMessage.getPlainBody();
  SpreadsheetDB.forEachRow(sheet, function(row) {
    var name = row[indexes["Name"]];
    var email = row[indexes["Email"]];
    var age = row[indexes["Age"]];

    var body = templateBody.replace(/<name>/g, name).replace(/<age>/g, age);
    GmailApp.sendEmail(email, subject, body);
  });
}

function getDraftMessageBySubject(subject) {
  var draftMessages = GmailApp.getDraftMessages();
  for (var i = 0; i < draftMessages.length; i++) {
    var draftMessage = draftMessages[i];
    if (draftMessage.getSubject() == subject) {
      return draftMessage;
    }
  }
}
The documentation for the built in libraries is very good. You can find the documentation for SpreadsheetApp here and for GmailApp here.
Let’s look at the pieces of this function individually:
var spreadsheet = SpreadsheetApp.getActiveSpreadsheet();
var sheet = spreadsheet.getSheetByName("Sheet 1");
This gives us a Sheet object that we can use to access and edit the main sheet of our spreadsheet.
The function call SpreadsheetDB.getColumnIndexesFromSheet(sheet) gives us back a mapping from column name to index. This is useful for accessing elements of a row by name later on. In our case, the result of getColumnIndexesFromSheet is the following mapping: {Name: 0, Email: 1, Age: 2}. This means that Name is column index 0, Email is column index 1, and Age is column index 2. We’re counting columns starting with zero. Perfect!
The call to getDraftMessageBySubject gets a draft from our Gmail drafts that we’ll use later to send the emails to our friends.
We use the SpreadsheetDB.forEachRow function to perform an action for each row in the spreadsheet except the headers. We pass a function with no name (an “anonymous function”) to SpreadsheetDB, and SpreadsheetDB will call that function once per non-header row of our spreadsheet.
    var name = row[indexes["Name"]];
    var email = row[indexes["Email"]];
    var age = row[indexes["Age"]];
The input to our anonymous function, row, is an array with the contents of the row currently being processed. From earlier, indexes[“Name”] is 0, indexes[“Email”] is 1, and indexes[“Age”] is 2. We can use this to get the name, email, and age of one of our friends from the spreadsheet.
var body = templateBody.replace(/<name>/g, name).replace(/<age>/g, age);
This is where the textual replacement actually happens. <name> is replaced with your friend’s name. <age> is replaced with your friend’s age. The ‘g’ indicates that a “global” replacement should be performed, so every time the string <name> appears it will be replaced by the name of your friend from the spreadsheet. Without the ‘g’, only the first occurence of <name> would be replaced.
GmailApp.sendMail(email, subject, body);
Last, this line sends the email!
Since this is JavaScript, you can comment out lines by putting // at the start of the line. Everything occuring after // on the line will have no affect.
I recommend commenting out the GmailApp.sendMail line before running this for the first time to so that you don’t accidently email people incorrectly.
Add the line Logger.log("To: " + email); Logger.log("Subj: " + subject); Logger.log("Body: " + body); in place of the GmailApp.sendMail line until you’re convinced that the correct emails are going to be sent to the correct people. Only once you are sure it’s working as intended, uncomment the GmailApp.sendMail line so it actually sends the emails.
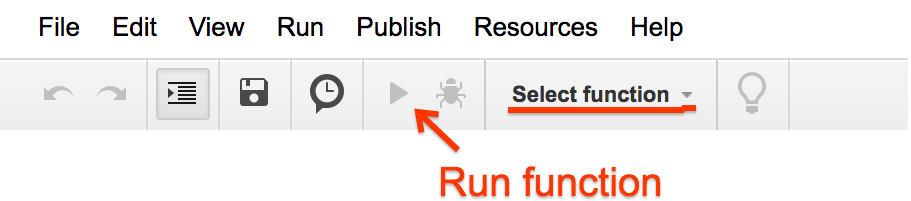
To run the performMailMerge function, choose performMailMerge from the dropdown and click the run (right-arrow) button. To see your logs (the inputs to the Logger.log function calls), choose “View > Logs” or press ctrl-Enter or cmd-Enter.
That’s it. When you run performMailMerge, the emails will be sent with the values from the spreadsheet substituted for the “
Finishing Touches
Finishing touch 1: Adding a “Status” column to avoid emailing people twice.
Name  Email  Age  Status
...   ...    ...  ...
Let’s add some finishing touches. Add to your spreadsheet a new column “Status”. When an email sends successfully, we’ll set the status of the row to “Done”. If the status of a row is already “Done”, we’ll skip that row. The updated code is shown here:
function performMailMerge() {
  var spreadsheet = SpreadsheetApp.getActiveSpreadsheet();
  var sheet = spreadsheet.getSheetByName("Sheet 1");
  var indexes = SpreadsheetDB.getColumnIndexesFromSheet(sheet);
  var subject = "Happiest Birthday!";
  var draftMessage = getDraftMessageBySubject(subject);
  var templateBody = draftMessage.getPlainBody();
  SpreadsheetDB.forEachRow(sheet, function(row) {
    var name = row[indexes["Name"]];
    var email = row[indexes["Email"]];
    var age = row[indexes["Age"]];
    var status = row[indexes["Status"]];

    if (status == "Done") {
      return;
    }

    var body = templateBody.replace(/<name>/g, name).replace(/<age>/g, age);
    GmailApp.sendEmail(email, subject, body);

    row[indexes["Status"]] = "Done";
    return row;
  });
}
In order to make this change, we just check the value of row[indexes["Status"]], and use a return statement to skip the row if the status is “Done”.
In order to update the row, we modify the row array and return it and SpreadsheetDB takes care of updating the underlying spreadsheet.
With this change in place, we can now add new recipients to our spreadsheet even after having run the performMailMerge function, and if we run performMailMerge again we won’t email anyone who has already received an email.
Finishing touch 2: Adding a menu item that triggers our function.
When we created our Apps Script, it was automatically associated with our spreadsheet. If we add a function named onOpen() to our Apps Script, it will automatically get run when the associated spreadsheet is opened. We can add a menu item to our spreadsheet by writing an onOpen function like this one:
function onOpen() {
  SpreadsheetApp.getUi()
  .createMenu('Mail Merge')
  .addItem('Send Emails', 'performMailMerge')
  .addToUi();
}
Go ahead and refresh your spreadsheet. You should now see a menu called “Mail Merge” with a menu item “Send Emails”. Selecting “Send Emails” will cause your performMailMerge function to be run.

Part 2: Scheduling Emails for the Future
In Part 1 we wrote a mail merge function that emails our friends “personalized” Happy Birthday messages when we run performMailMerge. But why would we want to say happy birthday to all our friends at once? That’s silly, it makes much more sense to send them a happy birthday message on their birthday. In this section, we’ll modify our mail merge to send emails only on the birthday of the recipient.
To start, let’s add a new “Birthday” column to our spreadsheet.
Name  Email  Age   Birthday  Status
...   ...    ...   ...       ...
We’re going to use the moment.js library for working with dates. Create a new file (File > New > Script File) in your Apps Script project. Call it moment.gs, or anything else, and paste in the contents of the moment.js library. You can copy and paste moment.js from here. Note: Be sure to use the non-minified version of moment.js; if you try using the minified version you will likely have trouble pasting the library into your Apps Script project.
Now that we have moment.js, we can get the date of our friends birthday like this:
moment(row[indexes["Birthday"]])
We can then write the function isTodaysDate like this. This will check that the month and day of the given date are today’s month and day, irrespective of what year the given date has.
function isTodaysDate(date) {
  var now = moment();
  return now.isSame(date.year(now.year()), "day");
}
Putting it all together, we have this updated version of performMailMerge that will only send the email if the current date matches the birthday of the recipient.
function isTodaysDate(date) {
  var now = moment();
  return now.isSame(date.year(now.year()), "day");
}

function performMailMerge() {
  var spreadsheet = SpreadsheetApp.getActiveSpreadsheet();
  var sheet = spreadsheet.getSheetByName("Sheet 1");
  var indexes = SpreadsheetDB.getColumnIndexesFromSheet(sheet);
  var subject = "Happiest Birthday!";
  var draftMessage = getDraftMessageBySubject(subject);
  var templateBody = draftMessage.getPlainBody();
  SpreadsheetDB.forEachRow(sheet, function(row) {
    var name = row[indexes["Name"]];
    var email = row[indexes["Email"]];
    var age = row[indexes["Age"]];
    var status = row[indexes["Status"]];
    var birthday = moment(row[indexes["Birthday"]]);

    if (status == "Done") {
      return;
    }
    if (!isTodaysDate(birthday)) {
      return;
    }

    var body = templateBody.replace(/<name>/g, name).replace(/<age>/g, age);
    GmailApp.sendEmail(email, subject, body);

    row[indexes["Status"]] = "Done";
    return row;
  });
}

function getDraftMessageBySubject(subject) {
  var draftMessages = GmailApp.getDraftMessages();
  for (var i = 0; i < draftMessages.length; i++) {
    var draftMessage = draftMessages[i];
    if (draftMessage.getSubject() == subject) {
      return draftMessage;
    }
  }
}
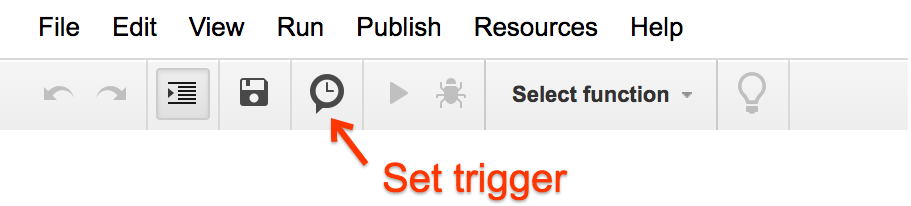
Now the only step remaining is to make this performMailMerge function run every day. To do this, click the “Triggers” button in the toolbar (the clock icon). Create a new time-based trigger, and set it up so that it runs Daily (you get to choose when each day it will run). Configure it to run the performMailMerge each day at a time of your choice.
Viola!
You now have a mail merge that’s running daily automatically, sending your friends Happy Birthday messages on their birthdays. Aren’t you a good friend?
While sending birthday emails automatically is somewhat impersonal, the techniques used here are broadly applicable. With Apps Script, you can send yourself reminders, monitor your Calendar events, track your finances, and more. It’s a super useful and super friendly set of APIs, and this automated birthday emailer just scratches the surface of what Apps Script makes possible.
Wrap up
You’ve now learned how to program a mail merge function that uses a spreadsheet as input. You can use a template to send multiple recipients personalized emails. You can schedule these emails to send in the future.
You now have a great power, and with it comes great responsibility. Don’t use this for spam. Be kind and courteous to your fellow citizens of the internet. If you find this useful, do let me know what you use it for (I’m @Bieber on Twitter). I’m using Google Apps Script for a variety of things these days and I am always interested to hear how others are using the same tools.